Make sure you've purchased all of the required
parts before beginning.
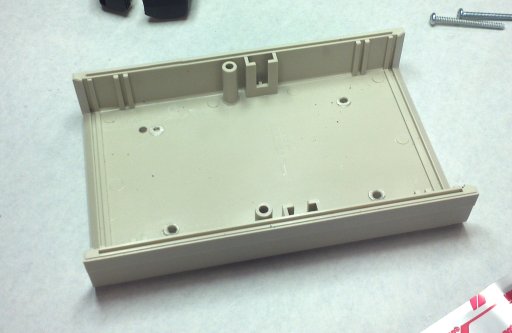
If you are using the recommended PacTec enclosure, it requires a few modifications.
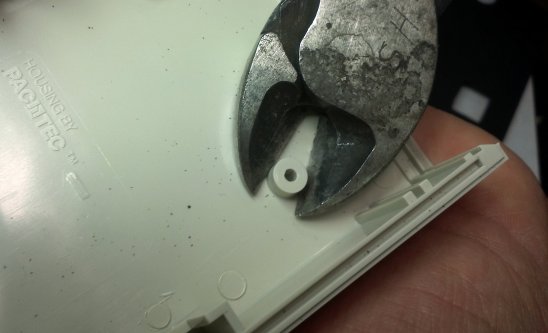
- Remove the four existing raised screw sockets from the inside bottom of
enclosure. A pair of angle cutters should do the trick.
- While holding the chipKIT on the enclosure's lower half, use a pen to mark
where the new mounting holes should go. They are asymmetrical, so they
definitely won't line up with the existing holes. Remove the chipKIT and drill
four new screw holes in the bottom of the enclosure.
- Put screws into the 4 holes from below the enclosure. Place the enclosure
down on a table so the screws are kept in place while you insert the chipKIT.
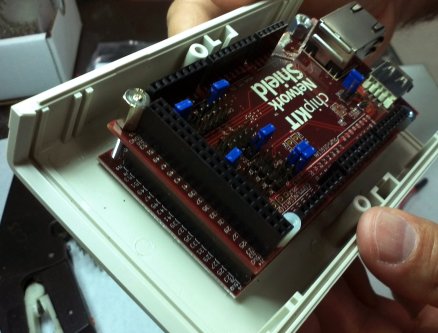
- Mount the Network Shield on the Max32.
- Fit the Max32 onto the 4 screws. Again, the mounting holes are asymmetrical,
so it should only fit one way.
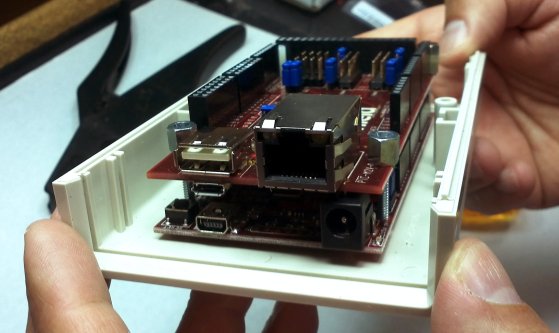
- Screw round stand-offs onto the screws. Tighten by holding stand-offs with
needle-nose pliers while tightening the other side with a screwdriver. Be
careful on the two screws nearest the Ethernet port - these don't have much
support, and the Network Shield could be damaged by over tightening.
- Using the template, drill a
hole for the OBD-II cable.
- Trim the OBD-II cable hole and shape it with a round file.
- Using the template, drill out and shape the hole for the USB cable using a
straight file.
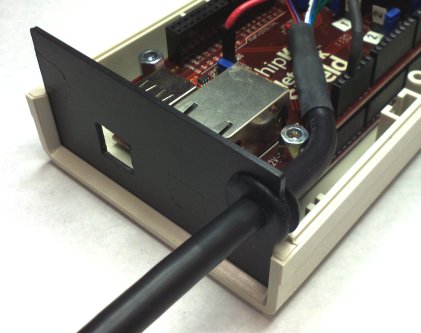
Slide the grommet to about where the front plate will be. Put the front plate on
the grommet. Lay the cable flat on the outside of the Ethernet jack. Bend the
cable between the standoff and the power connector, being careful to put as
little strain as possible on the small wires of the 2x6 connectors. Push the
front plate into place.
- Put the back plate into place and attach the top of the enclosure.
- Secure the enclosure with the two screws.
- Affix the four rubber feet to the underside just to the outside of the four
mounting screws. (This will prevent scratches from the exposed screws.)
- Attach the hook-side Velcro to the underside, leaving the enclosure screws
accessible.